| SEO | |
| Meta title | How to Install Shingles in Cold Weather? |
| Meta desc. | To install a shingle in cold weather, prepare the roof surface, install the underlayment, snap chalk lines, apply the starter strip, and nail the shingles. Read more. |
Shingle installation in winter requires special attention, since the shingles are prone to cracking and sealing problems. First, read the manufacturer’s instructions for temperature limitations and installation guidelines. Then, check if the weather is suitable for installation. It’s also important to store shingles somewhere warm before installation.
Before applying, the roof must be cleaned of dirt and debris. Add a low-temperature underlayment, mark chalk lines for proper alignment, and fit starter strips accurately. Nailing must be done cautiously, and roofing cement should be applied under each shingle. Following these steps, you can ensure a successful shingle roofing installation even in the cold weather.
Steps to Install Shingles in Cold Weather
Follow these steps for shingle installation in cold weather:
1: Check Manufacturer Guidelines
Start with reading the shingle maker’s instructions. These consist of temperature-safe limits, patterns of nails, and adhesion tips. Follow them to install properly and maintain your warranty.
2: Monitor the Weather
Look at the weather in advance. It’s best not to install in the snow or heavy rain. Choose a clear, sunny day. Sunshine warms the roof and also makes shingles more pliable.
3: Store Shingles Properly
Shingles become brittle and break more easily in the cold. Keep warm before installing. To maintain their flexibility, carry only a few at a time up onto the roof.
4: Prepare the Roof Surface
Ensure the roof deck is clean and dry. Sweep away frost, snow, or leaves. A clean surface allows the shingles to adhere better and seal properly.
5: Install Underlayment
Select a low-temperature underlayment. Synthetic underlayments are more tear-resistant and suitable for cold weather. Add a self-adhering ice and water shield for additional protection, particularly at the eaves, valleys, and vents. Use cap nails or plastic caps to secure adhesives if the temperature isn’t warm enough for bonding. This ensures that the material does not detract from the product until the temperature is high enough to activate the adhesive.
6: Snap Chalk Lines
Cloud and snow usually reduce visibility. In order to keep rows straight, snap colored chalk lines across the roof deck before you start installing the shingles. This is helpful for perfect alignment during the installation. Begin by marking the location for your starter strip and working from there with uniform spacing for every course. These lines help to keep the rows straight and prevent misalignment when using more rigid or slippery materials.
Read More: How does PVC Roofing Installation Help Meet Commercial Energy Code Requirements
7 Apply Starter Strip
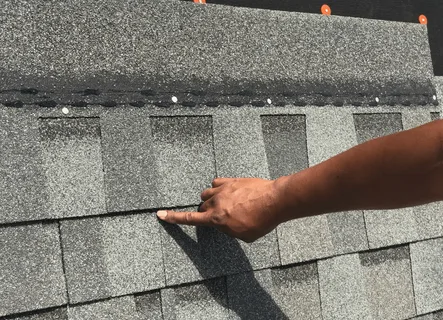
Run a starter strip along the lower eave (and rake) edges of the roof. This initial layer protects against water getting under the shingles. You can purchase factory-made starter strips, or you can create them by cutting your own from regular shingles, with the adhesive edge facing up. Hammer them gently, at the right intervals, and the right length. If adhesive isn’t sticking because of low temperatures, put roofing cement under them to keep them in place until they self-seal.
8: Nail Shingles Carefully
Shingles break easily in cold weather. When you nail, use a six-nail pattern instead of four to gain a more secure hold and wind resistance. If you use a nail gun, lower the air pressure to prevent driving the nails too far. Check each nail for proper securing, not overdriven or underdriven, to prevent adherence loss and leaks.
9: Use Roofing Cement Under Tabs
Because self-sealing strips don’t activate, shingles can fail to seal in cold weather. To prevent this, apply roofing cement under each course of shingles as you install them. Squeeze a small amount of cement, approximately a quarter-sized amount, underneath the bottom corners of each tab with a caulking gun. That keeps the shingles in place until the adhesive self-activates once temperatures warm up. Make sure to follow the shingle manufacturer’s requirements for the type and placement of adhesive.
10: Wait for Seal Activation
After installation, some of your shingles may not seal until the outdoor temperature reaches 40°F (4°C). Depending on your area’s climate, this sealing can take several days to weeks. Schedule a time to assess the roof again in the spring or early summer. Look at the tabs for the compromised seal. If you see loose tabs, press them back with roofing cement to prevent leaks or wind damage. Some people use a heat gun to manually activate the adhesive strip on a cold day. This approach can be effective for shingle sealing, but it is very risky. Too much heat can damage the shingles, causing them to curve or void the warranty. Do not use a heat gun unless permitted by the manufacturer.
Conclusion
Properly installing shingles in cold weather involves planning out your steps and executing them with precision. Read the manufacturer’s instructions and pick a day with suitable dry weather. Store your shingles in a warm place, and clean the roof before installing.
Next, lay down underlayment suitable for cold weather, snap chalk lines for straight rows, and fit the starter strip precisely. Careful nailing and cement under the tabs keep shingles in position. During shingle roofing installation, follow these steps carefully and pay attention to details for proper adherence, alignment, and sealing.


